Our team at David Resurface understands the frustration of seeing a beautiful backyard show its age. The 10-to-15-year mark is usually when Phoenix pool owners notice severe calcium buildup and start planning a waterline tile replacement process. This timeframe is the dividing line between standard maintenance and necessary restoration.
We find that ignoring these signs often leads to hidden water damage behind the concrete beam. A 2026 industry analysis shows that early intervention saves thousands in secondary structural repairs.
Let’s look at the exact pool tile replacement steps needed to protect your backyard investment.
The Waterline Tile Replacement Process in Five Steps
1. On-site consultation
Our initial visit focuses on mapping out the exact scope of your backyard project. Average residential pools in the US measure between 80 and 120 linear feet around the perimeter. Taking precise measurements allows us to calculate material needs and spot early signs of decking stress.
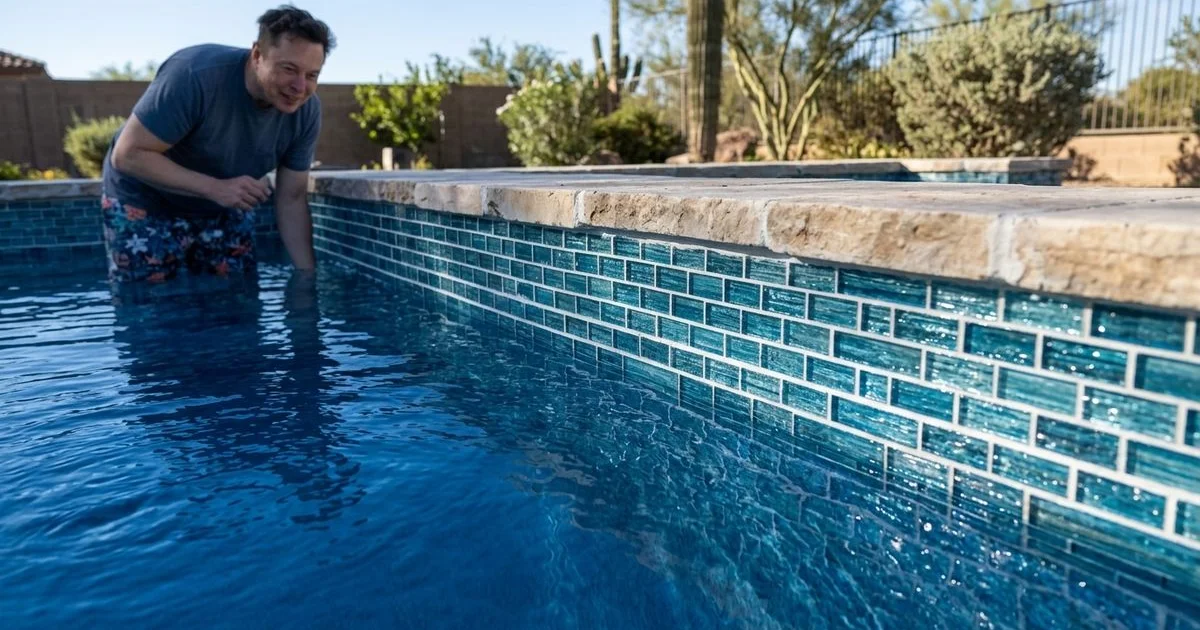
We then evaluate the existing tile and the concrete substrate underneath. Glass mosaic, ceramic, and natural stone each handle the intense Arizona heat differently. A high-quality porcelain tile is highly recommended for 2026 because it boasts a water absorption rate of less than 0.5 percent.
| Tile Material | Average Water Absorption | 2026 Arizona Climate Suitability |
|---|---|---|
| Porcelain | Under 0.5% | Excellent (Heat & UV Resistant) |
| Glass Mosaic | 0% (Impervious) | Excellent (Highly Durable) |
| Natural Stone | 3% - 7% | Moderate (Requires Regular Sealing) |
Our specialists always bring physical sample boards directly to your yard. Seeing the materials in your actual sunlight makes a massive difference in the final color selection.
2. Drain to below the waterline
Our crew lowers the water level to roughly 6 to 12 inches below the damaged area. A partial drain is extremely cost-effective for standalone tile work. This targeted approach prevents the need for a massive chemical rebalancing later.
We drop the water all the way to the floor if you are combining this job with a full resurface. Many homeowners worry about the massive water bill associated with a complete refill. Current 2026 utility data shows Phoenix municipal water remains highly affordable at just $4 to $10 per 1,000 gallons.
| Refill Method | Estimated Cost (15,000 Gallon Pool) | Time Required |
|---|---|---|
| Garden Hose (City Water) | $60 - $150 | 24 - 48 Hours |
| Water Delivery Truck | $1,000 - $2,000+ | 2 - 4 Hours |
Our local clients almost always choose the garden hose method for its unbeatable value. Opting for a water delivery truck makes sense only if you rely on a fragile private well.
3. Demolition
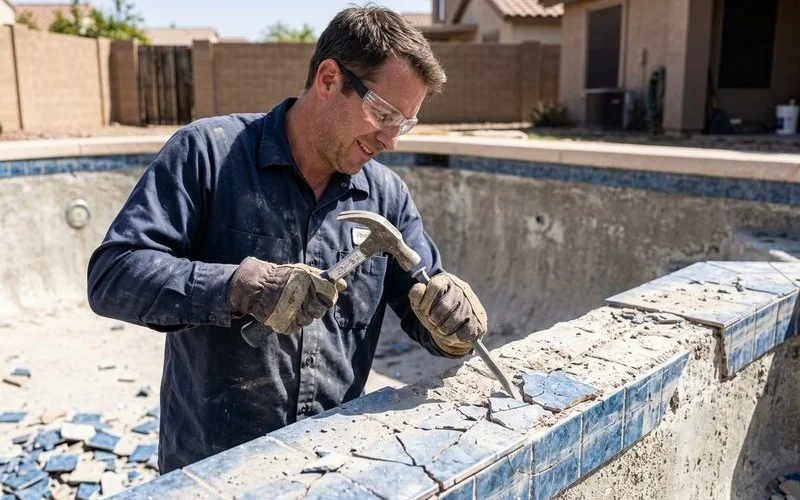
Our demolition phase requires careful, manual labor using chisels and small hammers. Taking the old materials off by hand prevents unnecessary shock to the surrounding pool shell. The mortar bed resting behind the original layout must be completely stripped away.
We carefully inspect the structural horizontal band at the waterline, known as the concrete bond beam. A condition called beam rot frequently hides out of sight until the coping is removed. Freeze and thaw cycles or constant moisture can turn solid concrete into a crumbling, sandy mess.
Our technicians actively look for these hidden voids or rusted rebar sections. Catching this deterioration now is critical for the long-term stability of your new installation.
4. Substrate repair
Our repair process begins by addressing any damaged thinset or mortar bedding discovered during demolition. Aging pools almost always require some level of surface rebuilding before fresh materials can be applied. Proper preparation ensures maximum adhesion for the new waterproof layers.
We patch and reinforce the concrete bond beam if cracking or severe spalling is present. Industry figures from 2026 indicate that typical beam repair runs an average of $75 per linear foot in the US. Fixing these structural defects involves several vital actions:
- Chipping away compromised material down to the solid beam.
- Treating or replacing rusted steel rebar sections.
- Forming and pouring fresh hydraulic cement.
- Establishing a true expansion joint to relieve deck pressure.
Our goal is to create a rock-solid foundation that will resist future shifting. Skipping this crucial stabilization is a common mistake that causes new tiles to pop right back off the wall.
5. Setting, grouting, and sealing
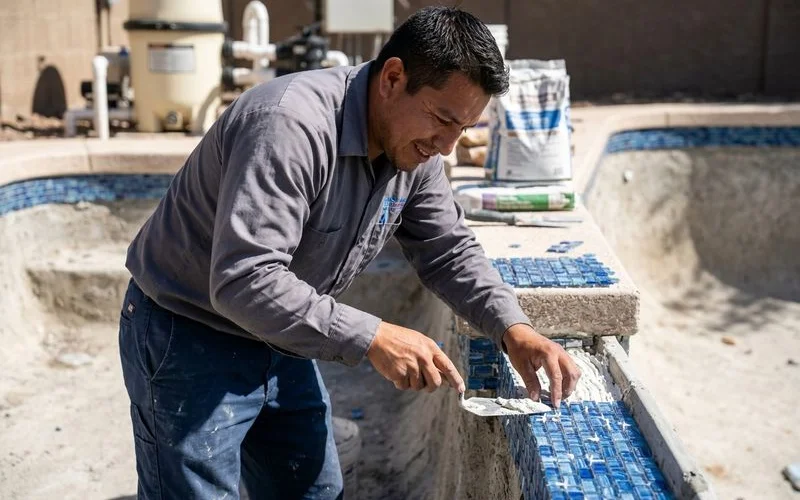
Our installers set the new tile using a premium waterproof thinset specifically designed for submerged environments. A product like Laticrete MULTIMAX 1 or 254 Platinum is heavily utilized because it exceeds stringent ANSI A118.15 performance standards. This high-grade adhesive ensures the tiles remain firmly anchored despite constant underwater exposure.
We carefully space and align every piece before allowing the installation to fully cure. The grout is applied only after the thinset has hardened completely. You can choose a grout color that perfectly matches or heavily contrasts with your chosen pattern.
Our final step involves applying a durable seal coat to lock the grout against moisture and chemical intrusion. This protective barrier makes routine cleaning much easier and extends the lifespan of the entire installation.
Pair with resurfacing to save a drain
Waterline tile replacement requires draining the pool. So does resurfacing. Combining the projects saves you one complete drain-and-refill cycle (thousands of gallons) and the setup fee that comes with it. If your pool is near replaster age, timing them together is the smart move.
Startup
Our technicians refill the pool and initiate the chemistry startup once the grout is fully cured, which usually takes 24 to 48 hours. Proper water chemistry is essential for protecting the fresh grout from harsh mineral scaling. Balancing the pH and alkalinity immediately prevents calcium from latching onto your new investment.
We follow the specific finish’s chemistry schedule if this project is combined with a full interior resurfacing. Fresh plaster requires a highly controlled curing environment to achieve maximum durability. Standalone tile jobs are much simpler, and your water chemistry returns to normal within a single day.
Our team provides comprehensive guidance on maintaining these pristine results long after the waterline tile process is complete.
See our waterline tile replacement service for an overview of premium materials, pricing ranges, and the combined project discount structure. If you are considering upgrading the entire pool interior, our Phoenix Pebble Tec resurfacing service expertly coordinates both jobs into one convenient scope.
